The Ultimate Guide to Perfect Deviled Eggs: From Boil to Bite
Deviled eggs are more than just an appetizer; they are a timeless classic, a beloved staple at everything from casual game day gatherings and lively potlucks to elegant holiday feasts. Their universal appeal lies in their creamy, savory goodness, yet achieving that perfect balance of flavor and texture can sometimes feel like an art. Whether you lean towards a classic, subtly sweet profile, a zesty kick, or an herby freshness, perfecting the art of deviled eggs is a culinary endeavor well worth your time. The secret to consistently delicious deviled eggs begins, surprisingly, not with the filling, but with the humble egg itself. We're about to unveil the expert strategies for flawlessly boiled eggs, effortless peeling, and crafting the smoothest, most delectable filling, ensuring your deviled eggs are always the star of the spread.
Mastering the Cook: The Foundation of Flawless Deviled Eggs
The journey to exceptional deviled eggs begins with the egg itself, specifically how it's cooked. Unlike a runny yolk you might enjoy at breakfast, deviled eggs demand a specific firmness. The yolks must be cooked to a completely solid, pale yellow state to ensure a smooth, well-incorporated filling. This isn't just a preference; it's a scientific necessity for the filling's texture.
- The Gentle Boil Method: One highly effective technique involves bringing a pot of water to a rolling boil, then immediately removing it from the heat. Gently lower your cold eggs into the hot water, ensuring they are not overcrowded. Cover the pan with a lid and let the eggs stand, undisturbed, for precisely 12 minutes. This method allows the eggs to cook gently without vigorous boiling, which can sometimes lead to cracking.
- The Steaming Alternative: For those who prefer a different approach, steaming eggs yields equally impressive results, often with the added benefit of easier peeling. Place a steamer basket in a shallow pot with about 1 inch of water, bringing the water to a simmer. Arrange your large eggs in a single layer in the basket, cover the pot, and steam over low to medium-low heat for 12 to 15 minutes.
- The Crucial Ice Bath: Regardless of whether you boil or steam, the very next step is non-negotiable: immediately transfer the cooked eggs to a bowl of ice water. This "shocking" process rapidly halts the cooking, preventing the eggs from overcooking and developing that dreaded rubbery texture or an unsightly greenish ring around the yolk. Allow them to cool for 2 to 3 minutes in the ice bath before proceeding to peel.
- Pot Size and Egg Quantity: Ensure you use a pot that allows your eggs enough room to move slightly without being cramped. Overcrowding can lead to uneven cooking or cracked shells. A good rule of thumb is to use a pot where the eggs can sit in a single layer with a little space between them.
The Art of the Effortless Peel: No More Frustration
Even perfectly cooked eggs can present a challenge if the shells cling stubbornly. Many tricks promise a simple peel, but a gentle touch and a bit of water are often all you need. The ice bath not only stops cooking but also helps separate the membrane from the shell, facilitating an easier peel.
- Gentle Cracking: Start by gently tapping the broader end of the cooled egg on a hard surface, like your countertop, until it cracks. Then, with light pressure, gently roll the egg over the surface to create more cracks and loosen the shell all around.
- Utilize Water: As you peel, if you encounter any stubborn shell pieces, a quick dip of the egg back into the ice water (or under a slow stream of cool water) can work wonders. The water seeps under the membrane, helping to dislodge those tricky bits without tearing the delicate egg white.
- Peeling Tip: While very fresh eggs are great for eating, eggs that are a few days old often peel more easily because their internal pH changes slightly, making the membrane less adherent to the white. Planning ahead can save you some frustration!
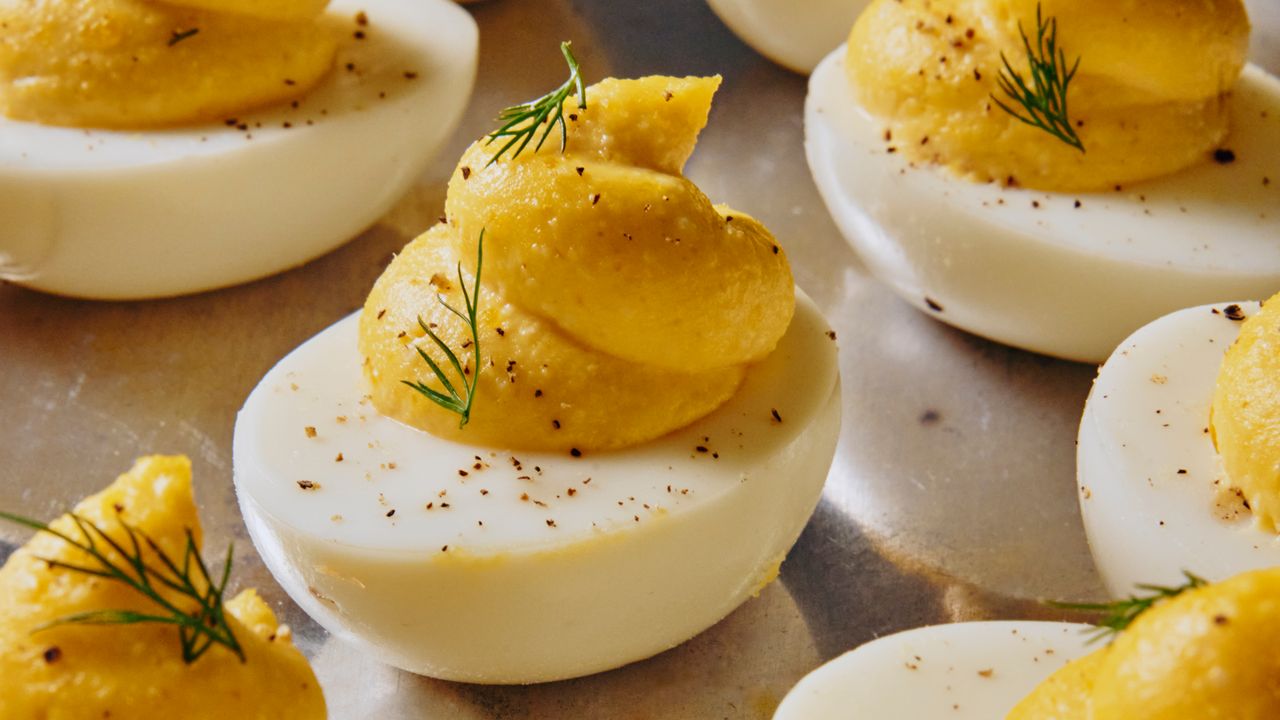
Crafting the Creamy Core: The Deviled Egg Filling Formula
With your perfectly cooked and peeled eggs, the stage is set for the star of the show: the rich, creamy filling. This is where your deviled eggs truly come to life, transforming simple ingredients into a harmonious blend of flavors and textures.
The first step is to prepare the eggs for filling. Carefully slice each hard-cooked egg in half, either lengthwise or crosswise – the choice is yours, often depending on your desired presentation. Then, using a small spoon, gently scoop out the firm, pale yellow yolks into a mixing bowl.
- Mash First, Mix Later: This is a golden rule for the smoothest deviled egg filling. Before adding any other ingredients, thoroughly mash the egg yolks with a fork until they are completely fine and free of lumps. This prevents over-mixing later, which can lead to a gummy or overly airy texture.
- The Core Ingredients: The foundation of any great deviled egg filling includes a few key components that provide richness, tang, and depth.
- Mayonnaise: This provides the essential creaminess and binds the filling together. High-quality mayonnaise makes a noticeable difference.
- Mustard: A crucial flavor component, mustard adds a tangy, slightly pungent note. Yellow mustard is classic, but Dijon can add a more sophisticated kick.
- Vinegar or Lemon Juice: A touch of acid, like white vinegar or fresh lemon juice, brightens the flavors and cuts through the richness of the mayonnaise, preventing the filling from tasting too heavy.
- Seasonings: Salt is vital for balancing flavors, and a sprinkle of paprika adds both a hint of subtle spice and a beautiful visual pop.
- Avoid Over-Mixing: Once your mashed yolks are ready and your other ingredients are added, mix just until everything is combined and smooth. Over-mixing can introduce too much air, making the filling fluffy but potentially compromising its creamy texture. If you prefer a slightly chunkier filling, you can stop mixing a little sooner.
Elevating Your Deviled Eggs: Beyond the Basics
While the classic deviled eggs recipe is undeniably delicious, there's a world of possibilities to explore once you've mastered the fundamentals. Think of the basic recipe as a canvas, ready for your culinary creativity.
Classic Enhancements for Texture and Flavor
The Allrecipes community-favorite recipe introduces delightful additions that elevate the standard fare:
- Diced Onion and Celery: Finely diced onion provides a subtle savory crunch and a hint of sharpness, while celery offers a refreshing, crisp texture. These vegetables add a fantastic textural contrast to the otherwise smooth filling. Be sure to dice them very finely so they integrate well without overpowering the creamy base.
- A Touch of Sweetness: A small amount of sugar can enhance the overall flavor profile by balancing the tanginess of the mustard and vinegar. It's often the subtle secret ingredient that makes a classic deviled egg truly irresistible.
Personalizing Your Perfect Deviled Eggs
Don't be afraid to experiment and make your deviled eggs uniquely yours. This is where your personal flair shines:
- Herbs: Fresh dill, chives, parsley, or even a sprinkle of tarragon can add a vibrant, aromatic dimension. Finely chop them and fold them into the filling.
- Spices: Beyond paprika, consider a pinch of cayenne pepper for heat, a dash of curry powder for an exotic twist, or even a smoky paprika for a deeper flavor.
- Other Mix-Ins:
- Relish: Sweet pickle relish or dill relish adds a tangy, crunchy element.
- Capres: For a briny, salty burst of flavor.
- Hot Sauce: A few drops of your favorite hot sauce can give a wonderful kick.
- Crispy Bacon Bits: A sprinkle of savory bacon can add a delicious umami and textural contrast.
- Avocado: For an incredibly creamy and slightly green filling, mash in some ripe avocado.
- Garnishes: A final flourish can make all the difference. Beyond the traditional paprika, consider a sprig of fresh dill, a tiny cornichon slice, a sprinkle of everything bagel seasoning, or even a single caper.
Remember, the key is to taste as you go. Adjust seasonings and additions until you achieve your ideal balance of flavors for your custom batch of deviled eggs.
Conclusion
From lively backyard BBQs to elegant holiday gatherings, deviled eggs consistently earn their spot as a crowd-pleasing appetizer. By focusing on the fundamentals—expertly cooking your eggs, mastering the gentle peel, and crafting a velvety-smooth filling—you lay the groundwork for culinary success. Then, with a dash of creativity and a willingness to experiment with flavors and textures, you can elevate this classic dish into a signature creation that's truly your own. So, next time you're planning a menu, remember these tips and prepare to impress with your perfect batch of deviled eggs. Happy cooking!
